Let's see how we can take advantage from this new technique of making forms and dealing with their validations.
Additionally to Template-driven forms this new technique was introduced since Angular version 2 to provide to the developers a more testable and consistent way to prepare input forms and their validations. For this purpose, Angular offers a really good set of built-in validators, but normally we face requirements that are beyond of their capabilities, that is when we need to implement our custom validators.
You can read more about Reactive Forms on the official documentation site of Angular here
In this post we’re going to use a registration form example to illustrate how we can take advantage of these validators, whether these are built-in or custom-made.
You can get the code used in this post on github, clone it and run it with Angular-cli
Import the required modules
First of all we need to import the ReactiveFormsModule into our application to enable all the required components to work with Reactive forms.
Create the model
Create the component
We will define our form controls and validations here. At line 22 you can see that we’re defining our form using the FormBuilder helper to make things more cleaner, also note the usage of some built-in validators for those fields required, their maximum and minimum length and even for email format validation using a regular expression.
There are some get() accessors defined here (line 47-52) to make it easier and cleaner to read the current controls state, properties and/or errors from the template side.
You can apply validators at any level of the form tree: control, group or even at form level. In this case we’re applying our custom validator checkPasswords at a controls group level (line 33), it will receive the group called passwords as argument, then it will be able to access the group’s child controls.
You can read more about Validators for Rective forms here
To keep it simple we will start defining our validator within the component itself. Give it at look to the function checkPasswords (line 37) and see how it’s accessing the group’s controls, evaluating their values and returning null if everything is as expected or returns a key-value object to report that the validation has failed. This will be added to the errors collection of the associated control or group, in this case will be added to the passwords group.
Let’s see how our component’s template is defined:
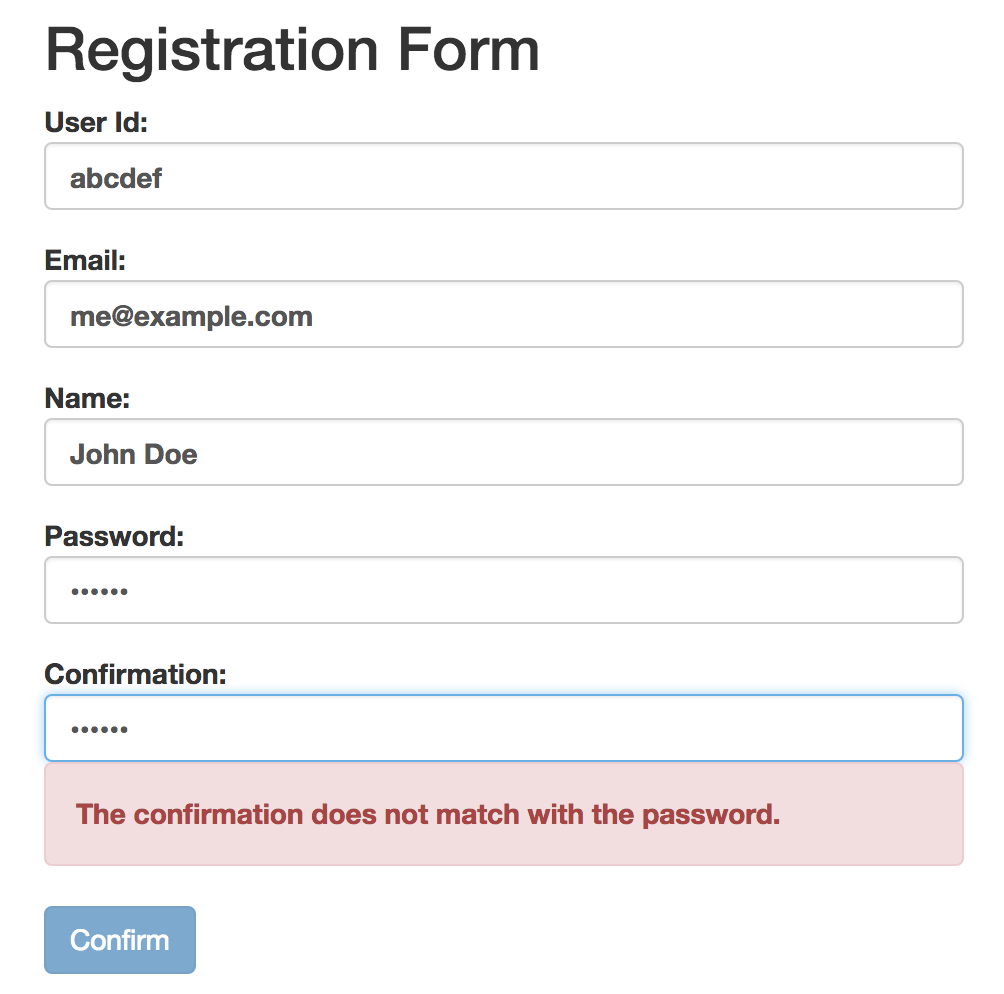
As a result from our checkPasswords validator we will be able to show to the user a message when the password and its confirmation do not match.
A reusable Custom Validator
In the previous example we defined our validator function as part of our component, but what if you need it on another one? You can have custom validators defined as directives that will be available for any component where you need them.
Wrapping up
Each way offers his advantages and disavantages, for example template-driven forms are asynchronous and reactive forms are synchronous, which I consider is an advantage from the latter one, because you avoid the common problem of having the model and rendering out of synchronization. Additionally you can unit test your components including forms easily, unlike template-driven forms which will require integration tests.